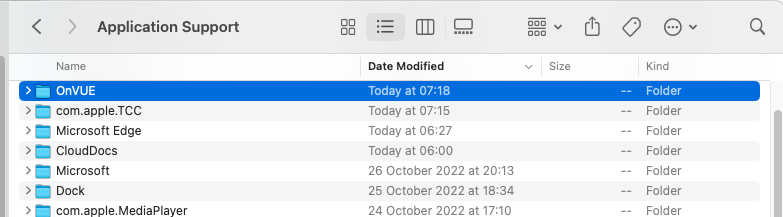
Recently booked an exam through Pearson Vue and opted for taking this at home using the OnVUE online proctoring .
The verification mode downloads a zip file that extracts to a standalone OnVue app that one can execute from the downloads folder.
The app requires access to files in your download folder; documents everywhere, camera and microphone. Also hooks into system events (probably used to shutdown down any other apps).
Removing it is not straightforward and a quick search found similar themes
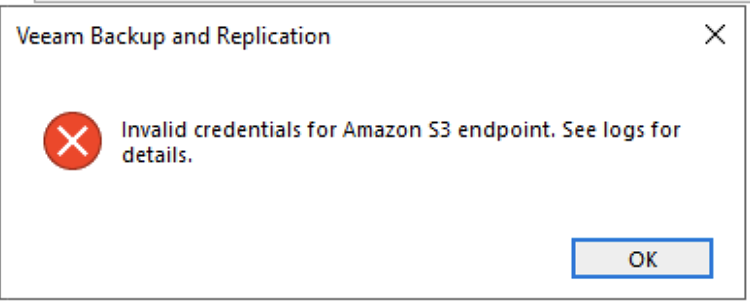
I hit this the error whilst adding a S3 Storage repository on Veeam Backup (version 10) – ” Invalid credentials for Amaazon S3 Endpoint.See logs for details” . The credentials we correct and verified using AWS CLI .
The cause is *not* a credentials issue but a permissions requirement by Veeam.
I found the IAM policy to below on AWS fixes the error. I think this can be improved and works for now. The error message could do with a bit of improvement though.
Working with setting up a Dell N1124P-ON switch recently and wondered how to clear the port level configuration without clearing the whole config or going. ‘no’ for each line entry.
Online reference pointed to the Dell Community portal which seems rather outdated. It is rather interesting to see , however; that it has come full circle to that post.
To clear port level settings on Dell N series to factory defaults without affecting any other part of the configuration
use the command ” default ” followed by the interface number like so
ell-1124P-ON#configure t

Dell-1124P-ON(config)#default gigabitethernet 1/0/5

This operation may take a few minutes.
The console prompt will return when the operation is complete.
Are you sure you want to factory default the interface configuration? (y/n) y
Dell-1124P-ON(config)#
After a helpful chat with VMware support; who kindly pointed me to the blog above , I have put together an updated version for 7.0b which has almost similar steps allowing for the now certified VMware driver.
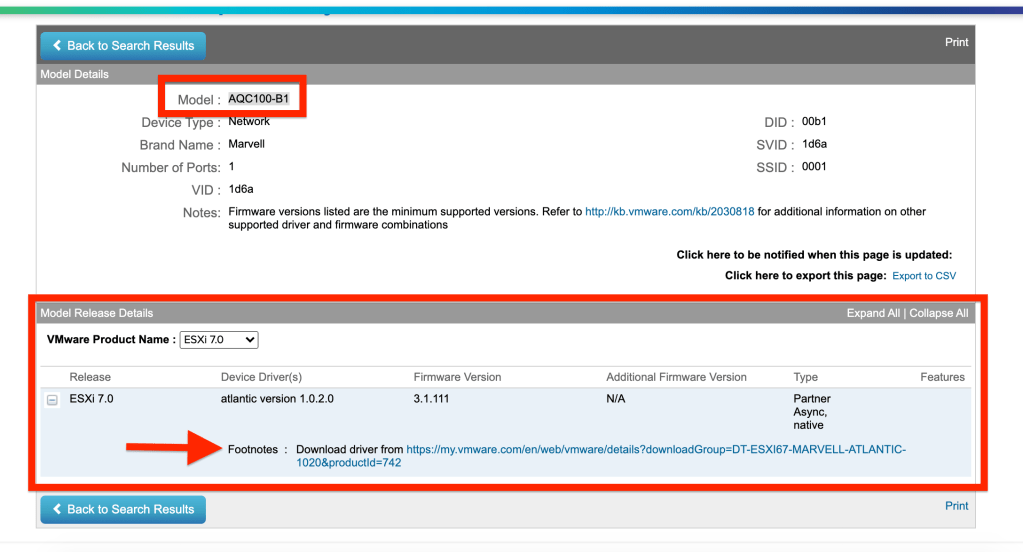
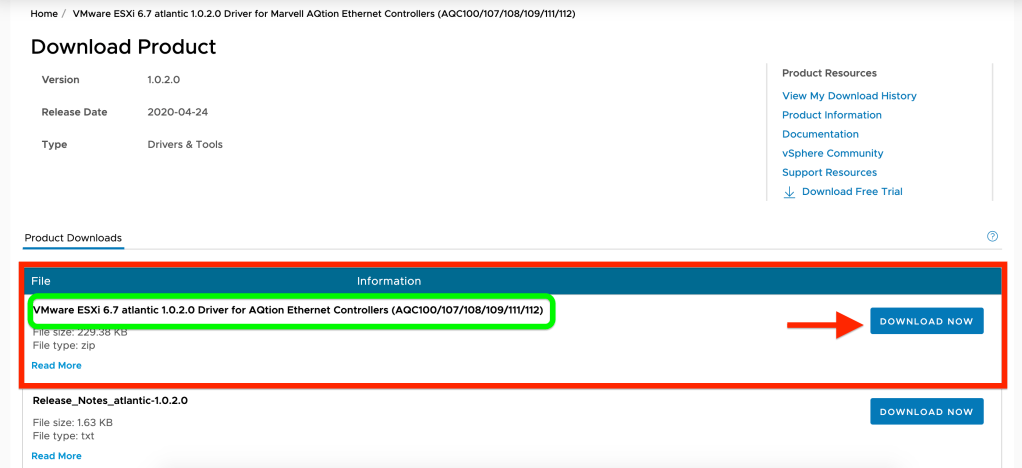
2.2 VMware prompts you to download the driver for 6.7 which is apparently the same for 7.0b.
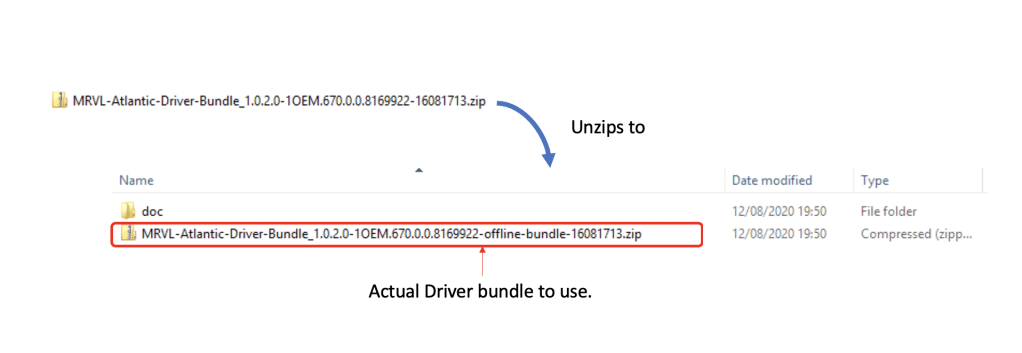
A file “MRVL-Atlantic-Driver-Bundle_1.0.2.0-1OEM.670.0.0.8169922-16081713.zip” would be downloaded. Note that this is not the file to import. If you import this ; you will get errors.
2.4 Unzip the above file – you will find another zip file called ‘MRVL-Atlantic-Driver-Bundle_1.0.2.0-1OEM.670.0.0.8169922-offline-bundle-16081713.zip’ within this. This is the file to import later.
Actual Driver File to Use
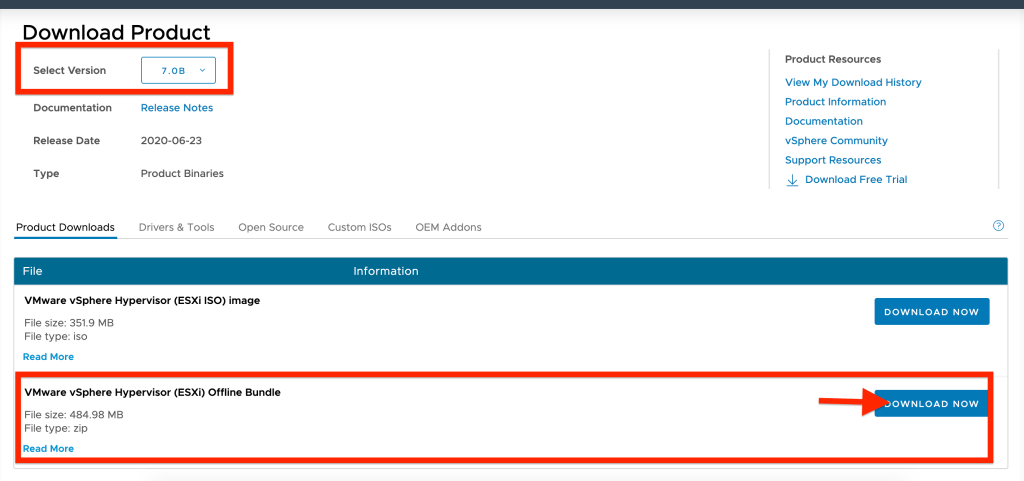
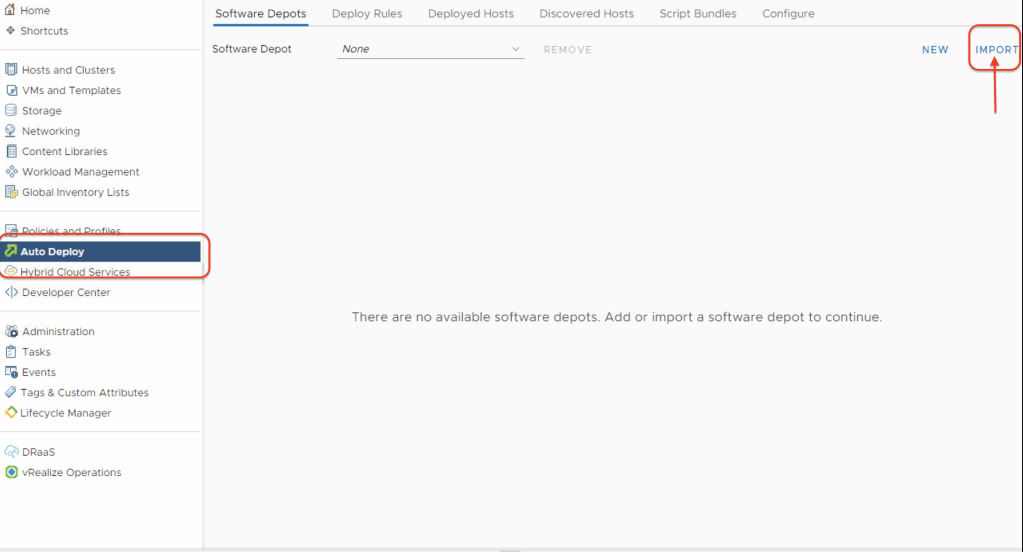
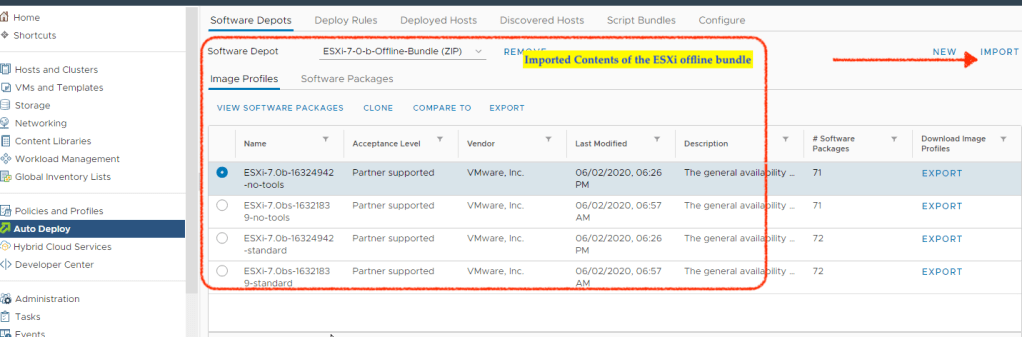
3. Login to your vCenter appliance (7.0b) and enable the Image Builder within ‘Auto Deploy’. Once enabled; select ‘Import’. This step imports the ESXi offline bundle from Step. 1
3.1 Upon successful completion of the import; following will be seen. Click on the import button again to import the network driver next.
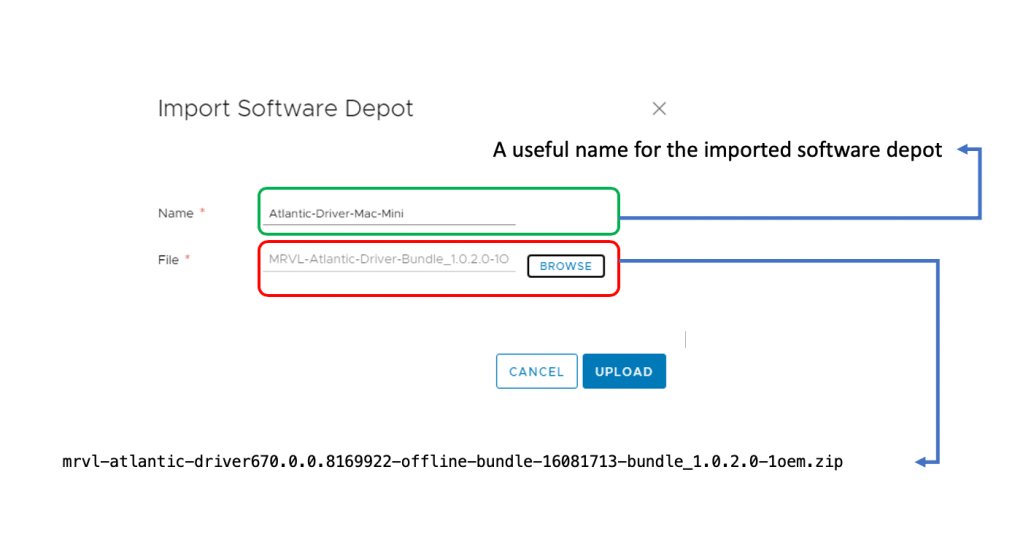
3.2Select the network driver downloaded in step 2.1 and unziped in step 2.4 called “MRVL-Atlantic-Driver-Bundle_1.0.2.0-1OEM.670.0.0.8169922-offline-bundle-16081713.zip”
3.3 Name the software depot / imported driver something meaningful.
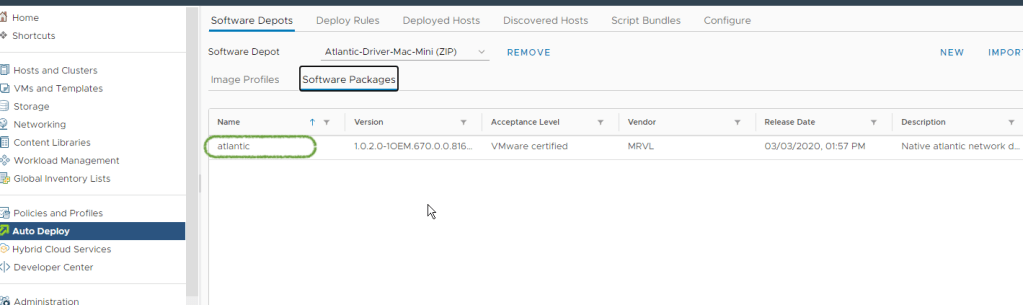
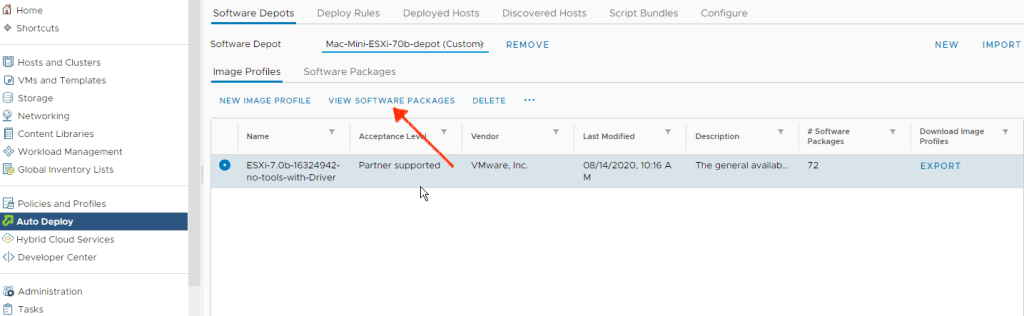
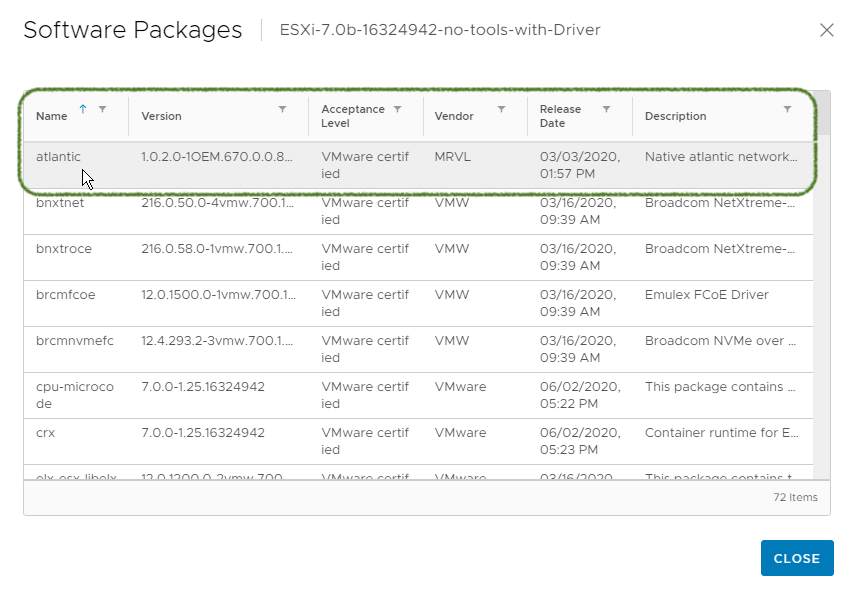
3.4Once import is completely ; please select the Software Depot where you have just imported the driver and click on the ‘Software Packages’ tab. to verify the contents as below . The Driver name should be visible as ‘atlantic’ and this has been certified by VMware.
3.5 It is now time to create a new Custom Depot into which we can import the ESXi image combined with the network driver. Click on ‘New’ and create a new Custom Depot.
3.6 Give the deport a name and click add.
3.7 The newly created custom depot would of course; be empty as below.
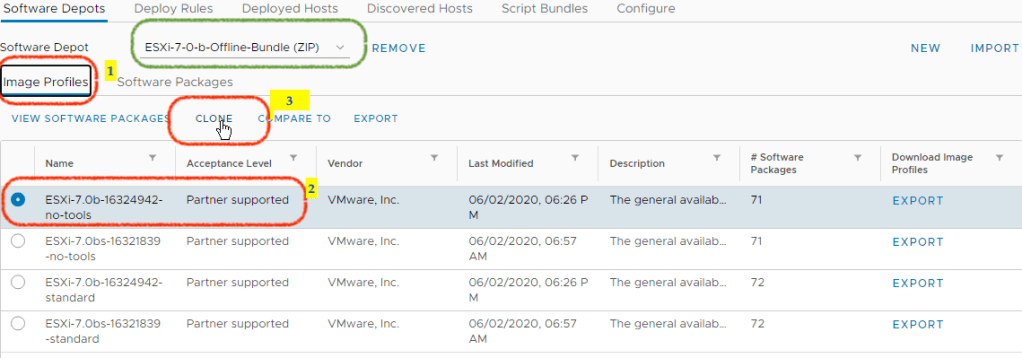
3.8 Change the software depot to the ESXi depot created in step 3.4 .
4 Click on Image Profiles and select the image profile “ESXi-7.0b-16324942-no-tools” which is usually the first one,. Click “Clone”
4.1 Progress through the windows as below – the aim is to clone the ESXi image and combine this with the driver. The destination software depot should be your custom depot created in step
4.2 Ensure that you have the driver ‘atlantic’ selected before clicking next. All the rest should be left at defaults.
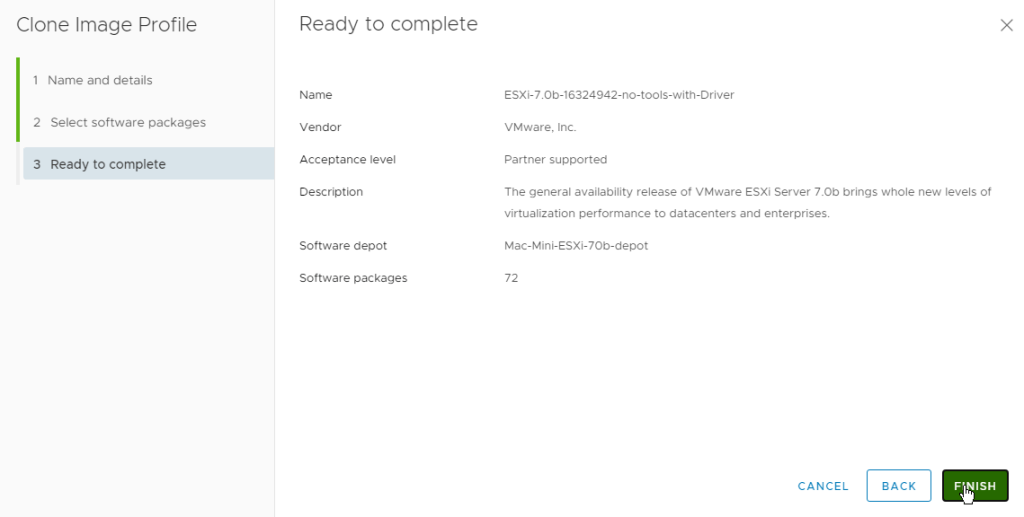
4.3 Verify that the Atlantic driver has been bundles into the ESXi installation package.
4.4
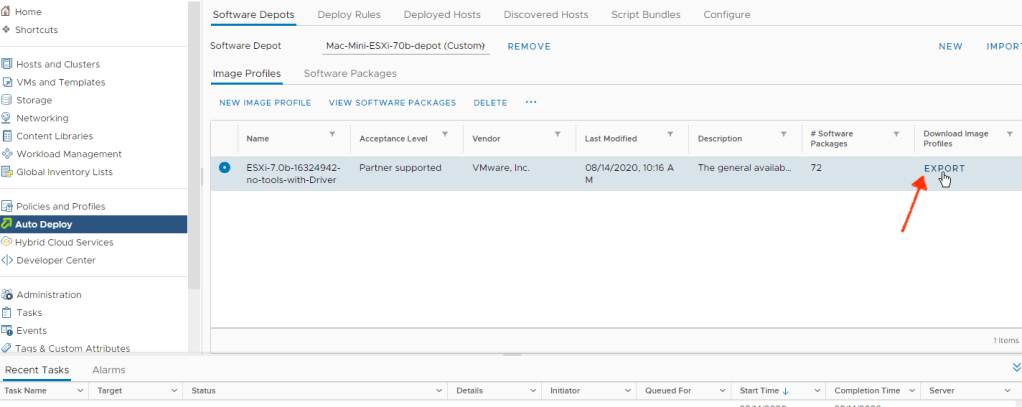
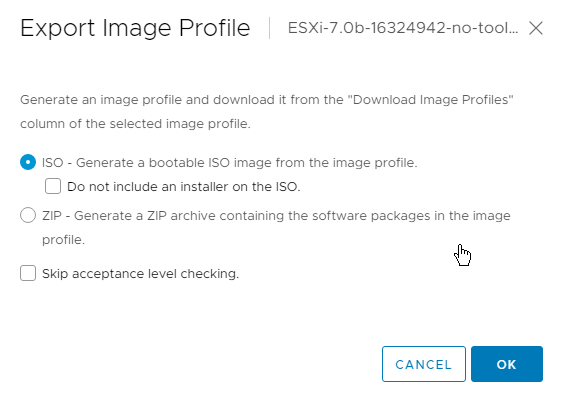
5. Close the above window and click on ‘Export ‘ . This creates an Imnage Profile within vCenter ready for download in the next step.
5.1
5.2 Exported ISO would have a guiid type name – change this if required.
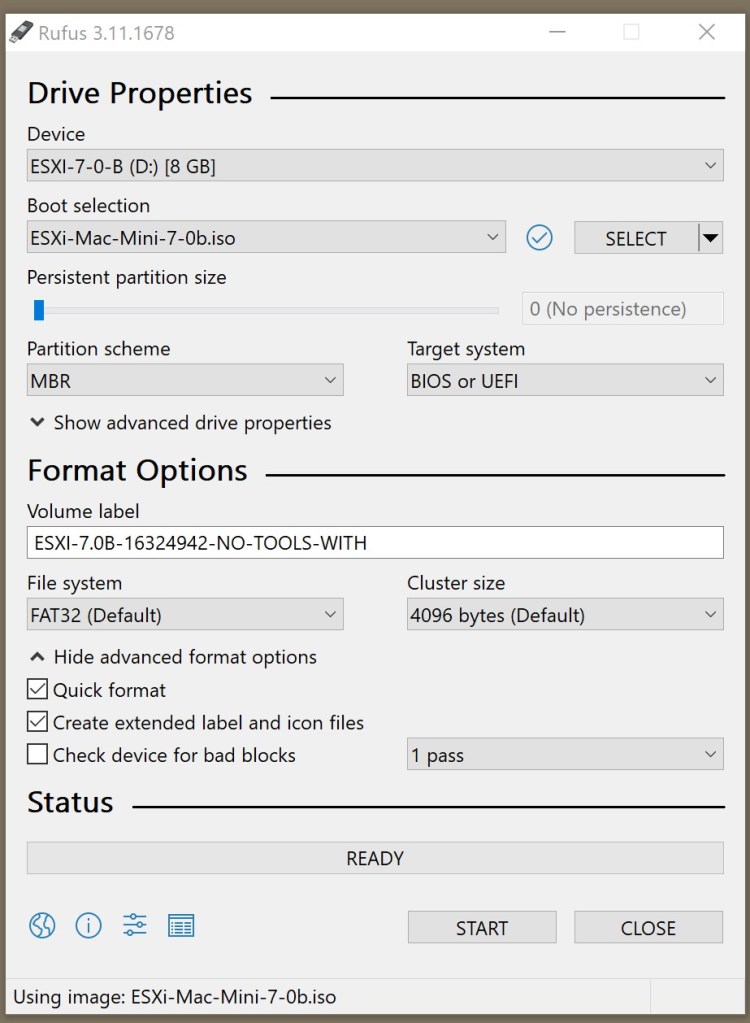
The exported ISO is now ready to be written to a bootable USB drive
6.0 I used Rufus to create a bootable USB drive with the settings below – with standard options. No extra settings was required.
This completes the process of preparing the USB installation drive which includes the network drivers Mac Mini 2018. Note that this can be reused to install ESXi 7 on any platform.
A follow up post about the actual installation is in the works. Hope this is helpful.
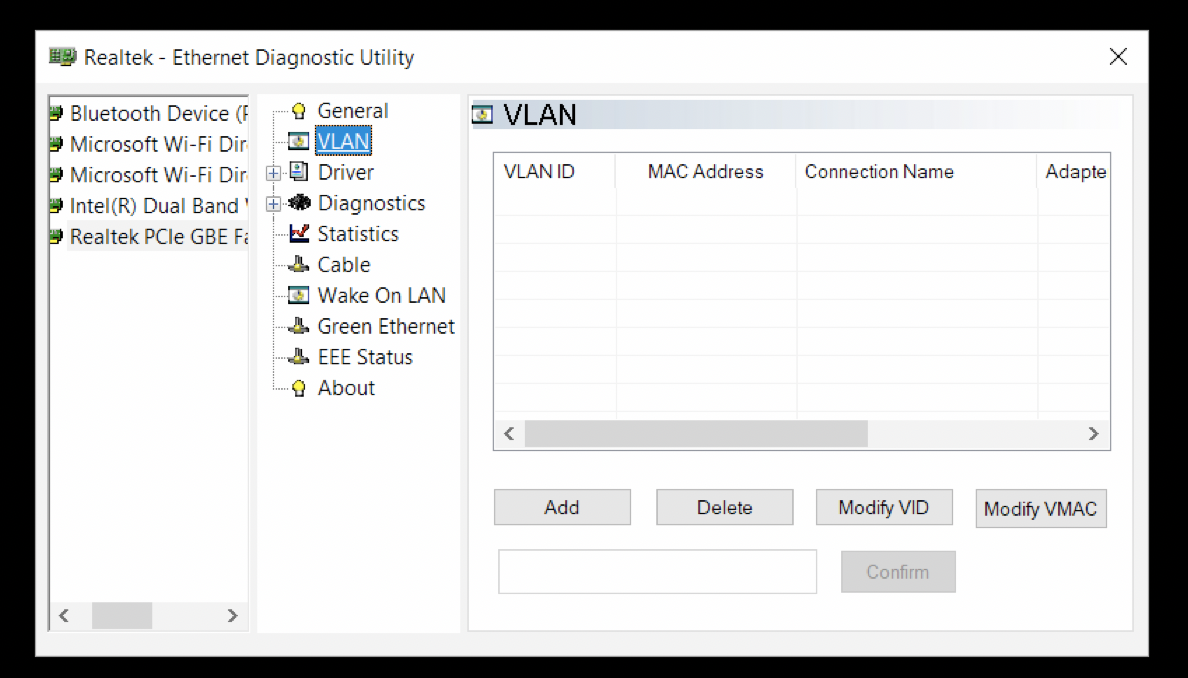
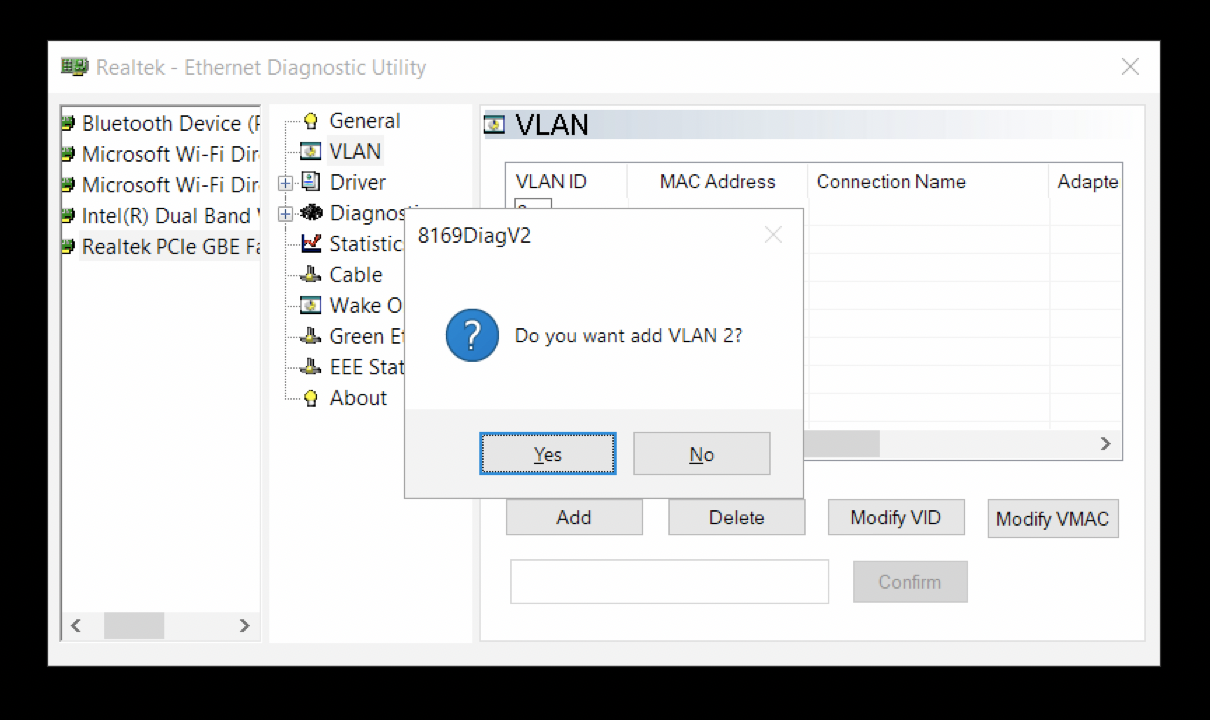
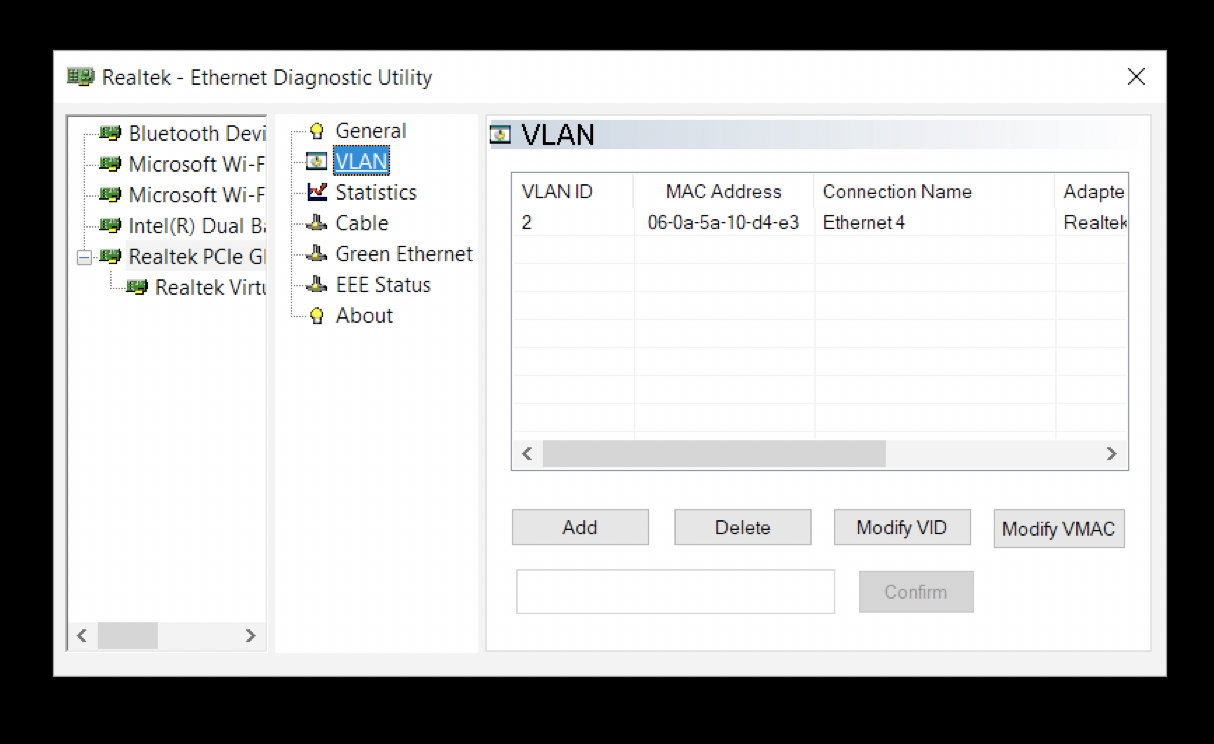
So this is how you get a Windows 10 Home laptop with Realtek PCIe card to be VLAN aware. The method was discovered during my search for testing the Sophos Remote Ethernet Devices (RED) device (a post for another day) from home over a broadband link.
This method has been tested to work with Dell Inspiron 7570 with Realtek PCIe GBE Family Controller .
Locate and download “Diagnostic Program for Vista/Win7/Win8/Win10”
Diagnostic Tool
You may use a disposable public email service like Mailinator to request the download link – but the hoops don’t stop there . Once you get past the annoying captcha you can then download and install the diagnostic tool.
Using Version 2.0.3.0 | Last updated :2018-08-02 04:50:50